Portable
Setting Up Portable Version
Download the ZIP archive with portable version of the program on to your computer. The downloaded file will have a look like this: RefShelf_x.x.x_win64.zip.
1. Unpacking
Unzip the downloaded archive to the desired folder. The software is ready for use right after unpacking.
2. Using Portable Version
Launch the RefShelf.exe file from it's location. At each startup, the program automatically checks and creates (if necessary) all configuration files and subfolders in the Current User's ".../AppData/Local/RefShelf" folder. Also, additional "RefShelf" subfolder will be created in the Current User's "Pictures" folder to store there images pasted from Clipboard's or added from web browsers by Drag & Drop.
For quick and easy access to the RefShelf.exe, you can create the desktop shortcut. To do that, make a right click on RefShelf.exe file. The context menu will appear.
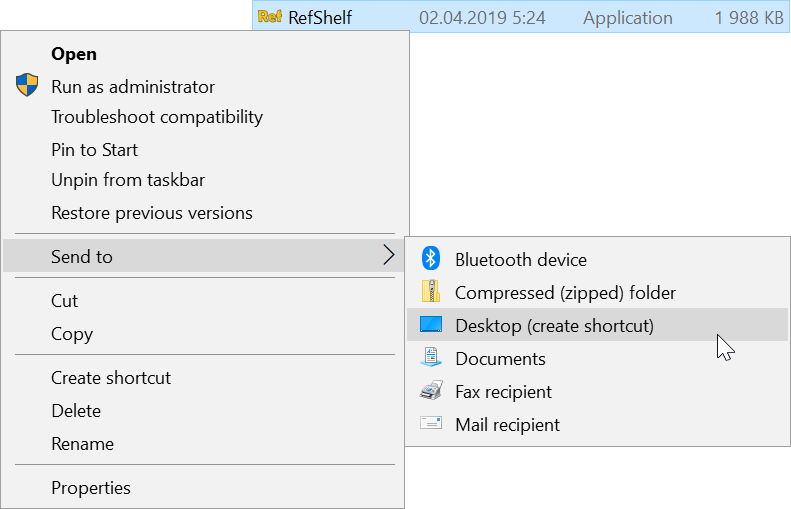
Choose the "Send to > Desktop (create shortcut)" option and the RefShelf shortcut will be created on your desktop. You can safely rename the shortcut using context menu available by the right click.
Removing Portable Version
1. Removing the RefShelf copy
To remove the portable RefShelf from your computer, first you gonna need is to delete the folder with the RefShelf program.
2. Removing the ...AppData\Local\RefShelf**
Warning
Before doing any manual changes in system folders on your system drive, make sure you know what you are doing. If you don't have a hands-on experience dealing with file system, limit the removing process to just deleting the program itself.
The program during its work creates few additional folders on your computer to store Program Data (see the Step 2. Using Portable Version). So, to finish up complete removal of the program from your computer, you may clean out all of the application's working traces including those additional folders.
The typical path to the Local AppData folder looks like this:
c:\Users\Username\AppData\Local\RefShelf
Where Username is the name of your current Windows user and the RefShelf is the folder you want to delete.
3. Removing the ...Pictures\RefShelf
To store images received from browsers and clipboards, the program creates the "RefShelf" subfolder in your "Pictures" folder. You may also want to remove it.
Tip
Before removing all of the image files stored in the "...Pictures/RefShelf" folder, look at them using an image viewer. You may find some of the images useful. If so, just move needed images to other locations before deleting "RefShelf" subfolder from "Pictures" folder.
The typical path to "RefShelf" subfolder in the the "Pictures" folder looks like this:
c:\Users\Username\Pictures\RefShelf
Where Username is the name of your current Windows user and the RefShelf is the folder you want to delete.